Using the AI Character Wizard to design your bot's personality
AI Chat lets your bot talk back with its own personality, memories, and voice. This guide walks you through enabling AI Chat on your bot, then using the AI Character Wizard to build a complete personality in just a few clicks.
From your bot's Management page, you will see a Talk with AI Chat option in the left-hand panel. This is where you turn AI Chat on for the first time and claim your free weekly Star Credits.
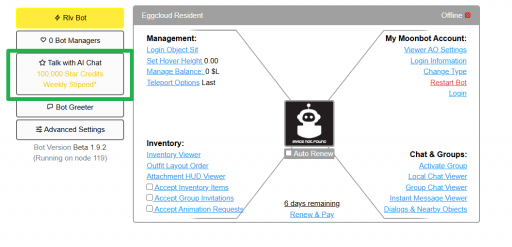
The bot Management page. Talk with AI Chat is highlighted in the left panel.
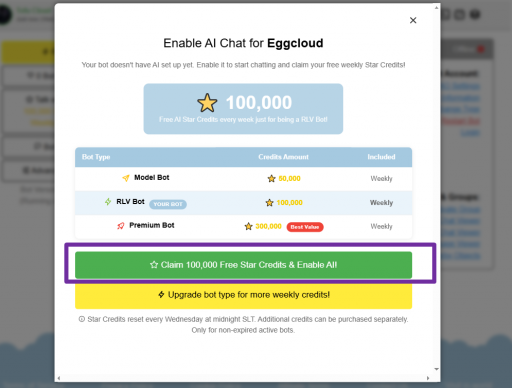
The Enable AI Chat window, showing Star Credit stipends by bot type.
Tip
Star Credits reset every Wednesday at midnight SLT. Additional credits can be purchased separately, and stipends only apply to non-expired, active bots.
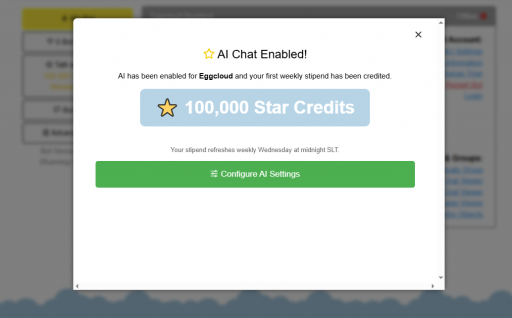
Confirmation that AI Chat has been enabled and the first stipend has been credited.
Once AI Chat is enabled, you can configure everything manually in AI Settings, or let the AI Character Wizard build a complete personality for you in a few guided steps.
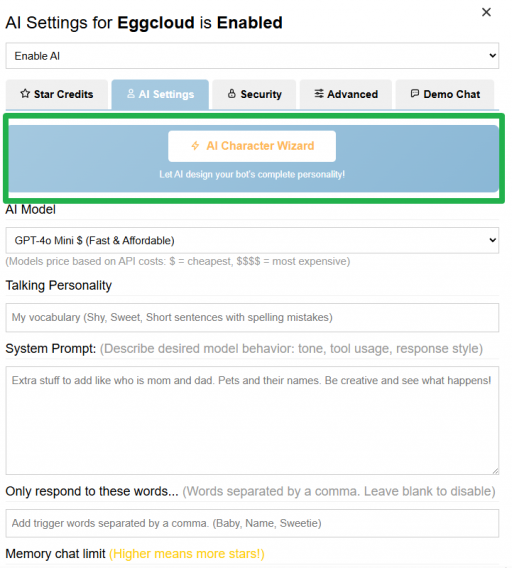
AI Settings for your bot. The AI Character Wizard banner opens the guided setup.
The wizard has six short steps. You can leave most fields blank and let the AI decide, or fill in as much detail as you want for a more specific personality.
Choose the category that best fits your bot. Family Roleplay covers family members, kids, and domestic roles, while Companions, Business, Entertainment, and General cover other use cases. Custom starts from scratch.
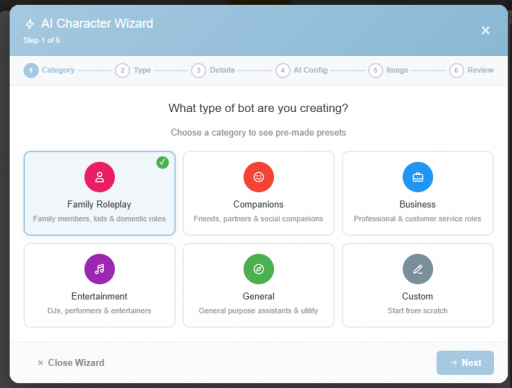
Step 1 of 6: choosing a character category.
Pick a character type within that category, such as Baby, Toddler, Child, Teen, Nanny, Pet, or Grandparent. Each type comes with a suggested age range and a pre-configured starting personality.
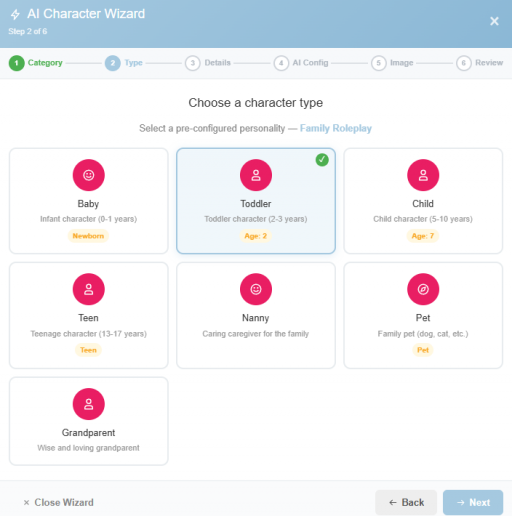
Step 2 of 6: choosing a character type, here Toddler.
Fill in as much as you know: speech style, language, gender, family members (such as Dad or Mom, tagged to an SL username), favorite things, home location, and any extra notes about your bot. Leave anything blank to let the AI decide.
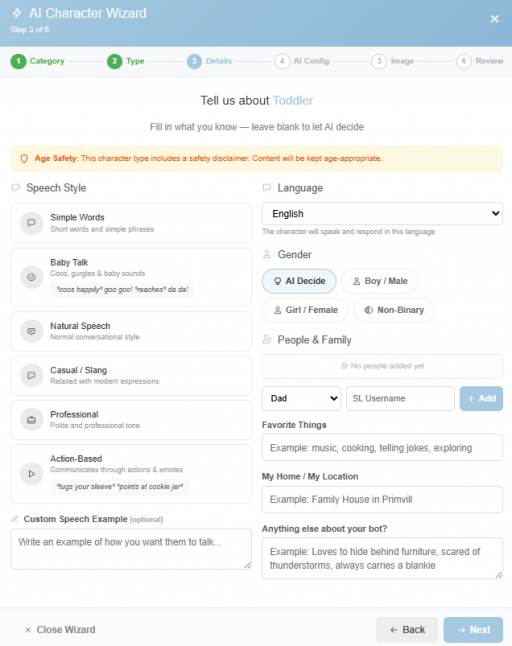
Step 3 of 6: character details, including speech style and family.
Important
Character types aimed at minors (like Baby, Toddler, or Child) include an age-safety disclaimer, and content is automatically kept age-appropriate.
Choose an AI model, set the response length, and adjust the memory slider. A higher memory setting means the bot remembers more of the conversation, but uses more Star Credits. You can also toggle Paragraph-style Roleplaying and Know who's nearby.
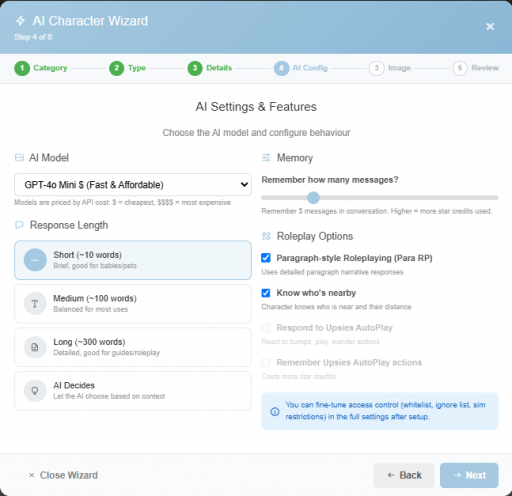
Step 4 of 6: AI model, response length, memory, and roleplay options.
Optionally add a written character description and upload a reference image. Both help the AI generate a richer, more accurate personality. You can also set the character's age here.
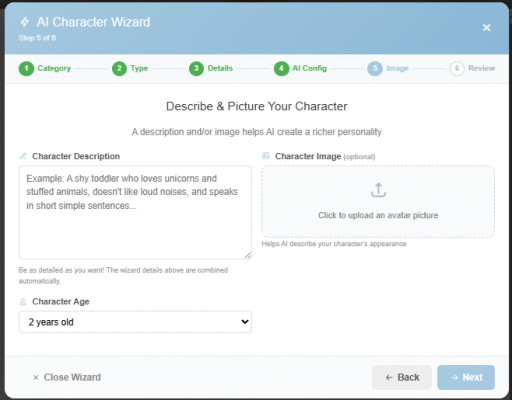
Step 5 of 6: an optional description and character image.
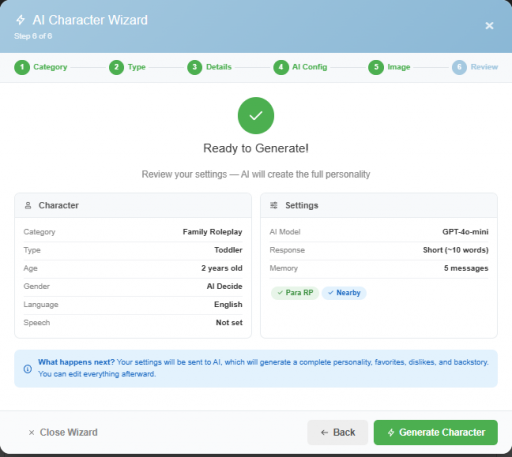
Step 6 of 6: final review before generating the character.
After the wizard generates your character, you land back on the AI Settings tab with the Talking Personality and System Prompt fields filled in for you. Review the generated text, make any edits you want, then save.
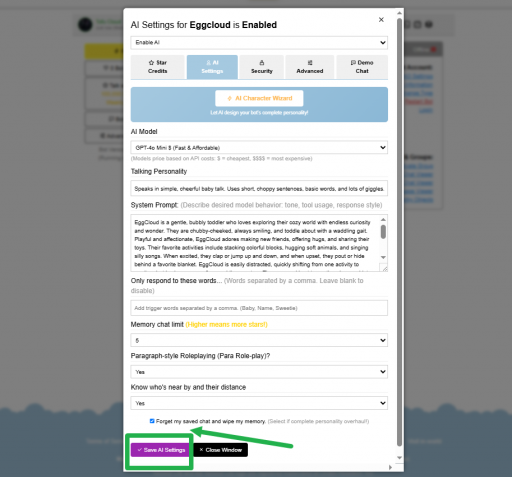
The completed AI Settings, ready to save.
Important
The Forget my saved chat and wipe my memory checkbox clears your bot's chat history and memory. Only select this if you want a complete personality overhaul, since this cannot be undone.
That's it! Your bot now has a full AI-driven personality. You can revisit AI Settings any time to fine-tune the talking style, adjust memory, or run the Character Wizard again for a fresh personality.
A few cookies keep you logged in and block bots, so those always run. Everything else stays off until you allow it: loading PayPal checkout, and any analytics we might add later. See our Cookie Policy.
Turn each purpose on or off. Nothing outside "strictly necessary" runs until you allow it, and you can change this whenever you like from the Cookie Settings link in the footer.
Keeps you logged in, protects the site from bots and abuse, and remembers settings you have deliberately changed, such as dark mode. Without these the site does not work.
PHPSESSID (login session, ends when you close the browser), cf_clearance (Cloudflare bot protection, 12 months), mb_consent (stores this choice, 6 months), theme and wm_dismissed (written only when you switch the theme or dismiss a notice, so they record a choice you made)
Loads PayPal so you can add funds to your wallet. PayPal stores data on your device to process the payment and detect fraud. If this is off, the PayPal checkout will not load until you allow it.
__paypal_storage__ and related PayPal storage, set by paypal.com
Measures which pages get used so we can improve them. Off by default and not in use today. The toggle is here so nothing can start without asking you first.
None in use today
Builds a profile of your interests to show you ads elsewhere. Off by default and not in use today.
None in use today
 MoonBots
 [Starries]