Premium Bot Feature
Group notices let your bot send announcements straight to your Second Life group members, no need to log in and send them yourself. You can send a notice right away, schedule one for later (including recurring notices), and review everything you have sent in the past. This guide walks through all three.
Premium Feature
Group notices are a premium bot feature. If you do not see the Send Notice option on your Manage Bot page, check that your bot's subscription includes this feature.
From your bot's Manage Bot page, click the Send Notice button in the left sidebar. This opens the notice window, which has three tabs: Send One Time Notice, Schedule Notices (Beta), and Past Notices.
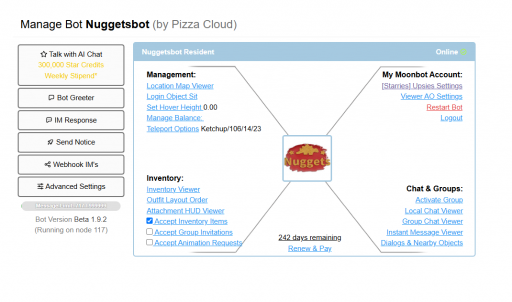
The Manage Bot page, with the Send Notice button in the left sidebar.
Use this tab when you want a notice to go out immediately.
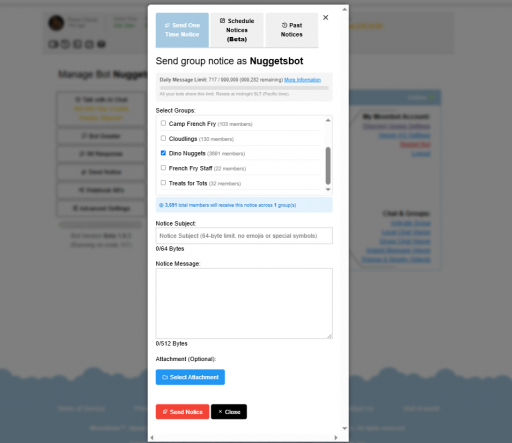
The Send One Time Notice tab, with Dino Nuggets selected as the recipient group.
Important: Daily Message Limit
Second Life restricts bot (Scripted Agent) messages to a maximum of 5,000 individual messages per calendar day. All bots on your account share this same daily aggregate limit, so sending a notice to a large group can use up a big chunk of it. You can see your current usage at the top of the notice window (for example, 717 / 5,000). This resets at midnight Pacific time (SLT).
The Schedule Notices tab lets you plan notices ahead of time, including notices that repeat on a schedule.
Click the Schedule Notices (Beta) tab to see a calendar for the current month. Use the arrow buttons to move between months, and click + Schedule New Notice to create one.
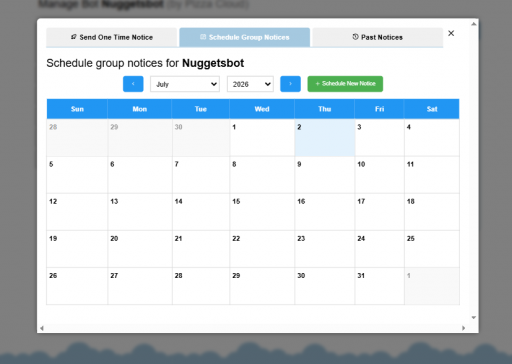
The monthly calendar view for scheduled notices.
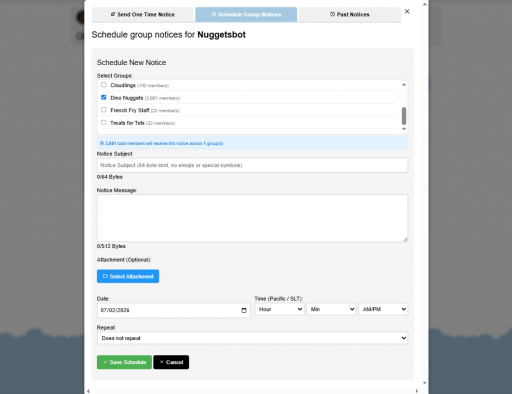
The Schedule New Notice form, with group, subject, message, date, time, and repeat options.
The Past Notices tab keeps a history of everything your bot has sent, whether it went out immediately, was scheduled, or came in through the API.
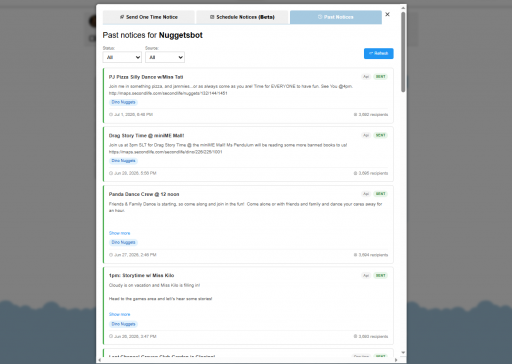
Past Notices, showing sent notices with recipient counts and timestamps.
Tip
Click Show more on a past notice to expand and view the full message text.
A few cookies keep you logged in and block bots, so those always run. Everything else stays off until you allow it: loading PayPal checkout, and any analytics we might add later. See our Cookie Policy.
Turn each purpose on or off. Nothing outside "strictly necessary" runs until you allow it, and you can change this whenever you like from the Cookie Settings link in the footer.
Keeps you logged in, protects the site from bots and abuse, and remembers settings you have deliberately changed, such as dark mode. Without these the site does not work.
PHPSESSID (login session, ends when you close the browser), cf_clearance (Cloudflare bot protection, 12 months), mb_consent (stores this choice, 6 months), theme and wm_dismissed (written only when you switch the theme or dismiss a notice, so they record a choice you made)
Loads PayPal so you can add funds to your wallet. PayPal stores data on your device to process the payment and detect fraud. If this is off, the PayPal checkout will not load until you allow it.
__paypal_storage__ and related PayPal storage, set by paypal.com
Measures which pages get used so we can improve them. Off by default and not in use today. The toggle is here so nothing can start without asking you first.
None in use today
Builds a profile of your interests to show you ads elsewhere. Off by default and not in use today.
None in use today
 MoonBots
 [Starries]